
Interfacing DS18B20 Digital Temperature Sensor with Arduino
A DS18B20 1-Wire Temperature Sensor is one of the easiest and most cost-effective ways to add temperature sensing to your Arduino project. These sensors offer high precision and operate without the need for external components. With just a few simple connections and some Arduino code, you can quickly and accurately measure temperature!
TRAINING
2/1/20254 min read
Introduction:
A DS18B20 1-Wire Temperature Sensor is one of the easiest and most cost-effective ways to add temperature sensing to your Arduino project. These sensors offer high precision and operate without the need for external components. With just a few simple connections and some Arduino code, you can quickly and accurately measure temperature!
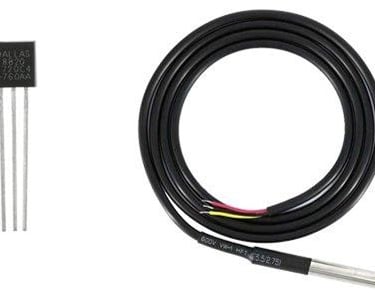
DS18B20 1-Wire Temperature Sensor
The DS18B20 is a 1-wire temperature sensor developed by Dallas Semiconductor (now part of Maxim Integrated). Since it operates on a 1-wire protocol, it requires just a single digital pin to communicate with a microcontroller.
This sensor is commonly available in two different form factors:
TO-92 Package – Resembling a standard transistor, this version is compact and ideal for general-purpose temperature sensing.
Waterproof Probe – Designed for remote sensing, this version is perfect for measuring temperature in underwater environments, soil, or other remote locations.

DS18B20 Temperature Sensor
The DS18B20 is a high-precision temperature sensor that operates without the need for external components. It offers a temperature range of -55°C to +125°C with an accuracy of ±0.5°C.
The sensor's resolution is adjustable to 9, 10, 11, or 12 bits, with the default resolution set at 12-bit (providing a precision of 0.0625°C). It functions within a 3V to 5.5V power supply and consumes just 1mA of current during active temperature conversions.
Specifications:
Power Supply: 3V to 5.5V
Current Consumption: 1mA
Temperature Range: -55°C to +125°C
Accuracy: ±0.5°C
Resolution: Selectable (9 to 12 bits)
Conversion Time: Less than 750ms
Connecting Multiple DS18B20 Sensors
A key advantage of the DS18B20 is its ability to connect multiple sensors on a single 1-Wire bus. Each sensor comes with a unique 64-bit serial code, allowing them to be individually identified and managed.
This feature is particularly useful when monitoring temperature across a large area with multiple sensors.
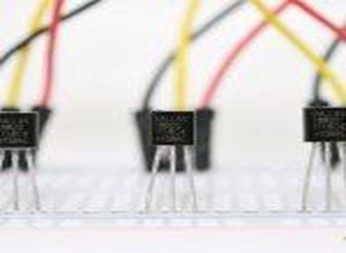

Interfacing Multiple DS18B20 Temperature Sensors with Arduino
A key feature of the DS18B20 temperature sensor is its ability to support multiple sensors on a single 1-Wire bus. Each DS18B20 comes with a unique 64-bit serial code, allowing them to be individually identified and managed.
This capability enables the simultaneous monitoring of multiple temperature points using just one Arduino pin, making it ideal for applications that require temperature tracking over a large area.
DS18B20 Sensor Pinout
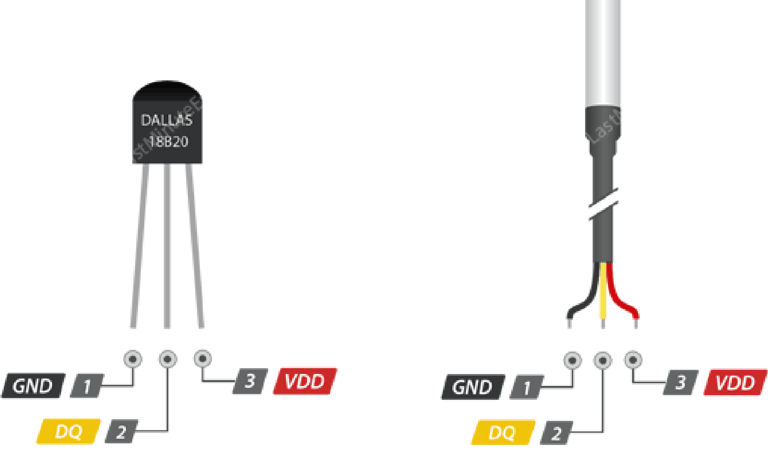
DS18B20 Temperature Sensor Pinout & Wiring with Arduino
GND – Ground pin, connected to the Arduino’s GND.
DQ – 1-Wire Data Bus, connected to a digital pin on the Arduino.
VDD – Power supply pin, operates within a voltage range of 3.3V to 5V.
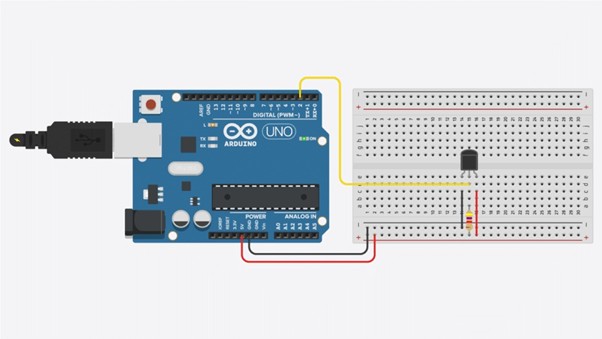
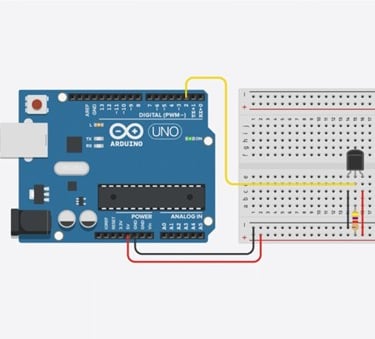
Wiring the DS18B20 to an Arduino
Connecting the DS18B20 temperature sensor to an Arduino is simple:
VDD → Connect to 5V on the Arduino.
GND → Connect to GND on the Arduino.
DQ → Connect to Digital Pin 2 on the Arduino.
4.7kΩ Pull-up Resistor → Place between DQ and VDD to ensure stable data transmission. (Note: The Arduino's internal pull-up resistors are not sufficient for this sensor.)
Connecting a Waterproof DS18B20 Temperature Sensor to Arduino
If you're using the waterproof version of the DS18B20, follow these connections:
Red Wire → Connect to 5V on the Arduino.
Black Wire → Connect to GND (Ground).
Yellow Wire → Connect to Digital Pin 2 on the Arduino.
Additionally, place a 4.7KΩ pull-up resistor between the yellow (data) wire and 5V to ensure stable communication.
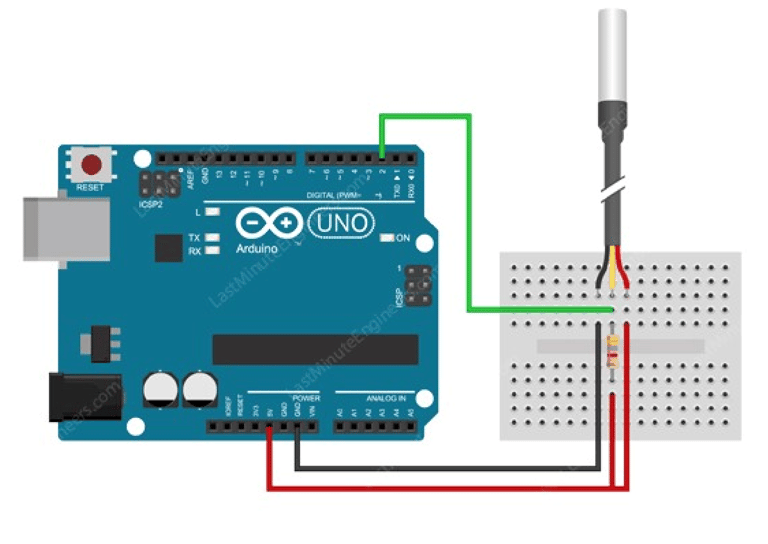

Wiring Waterproof DS18B20 Temperature Sensor to Arduino
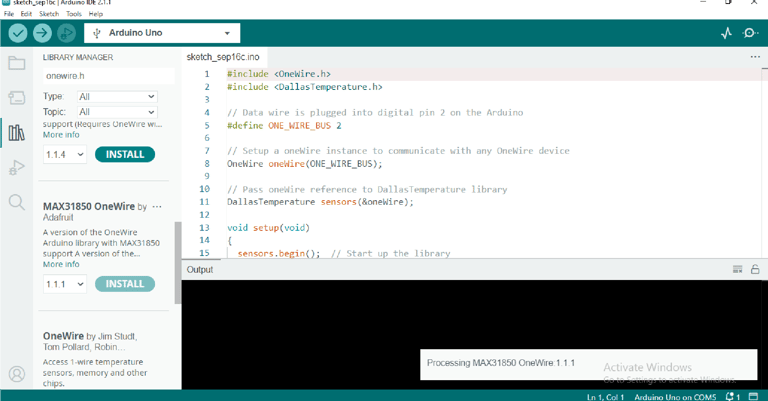
Installing the Required Library
The code utilizes the OneWire.h library. You can easily download and install it through the Library Manager in the Arduino IDE.
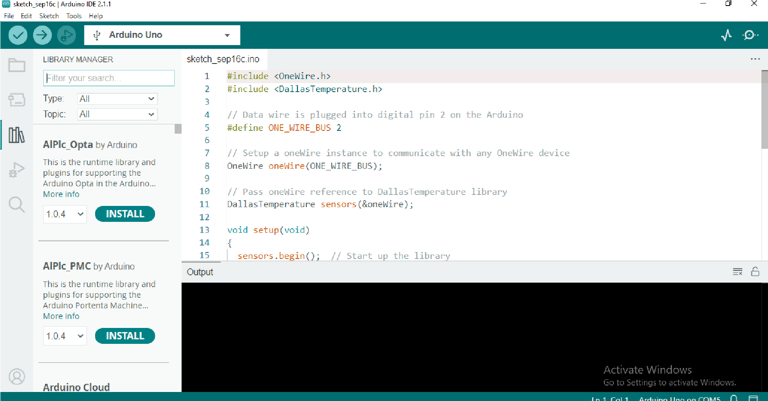
To install the library, open the Arduino IDE and navigate to Manage Libraries. Then, search for OneWire.h and install it, as shown in the image below.

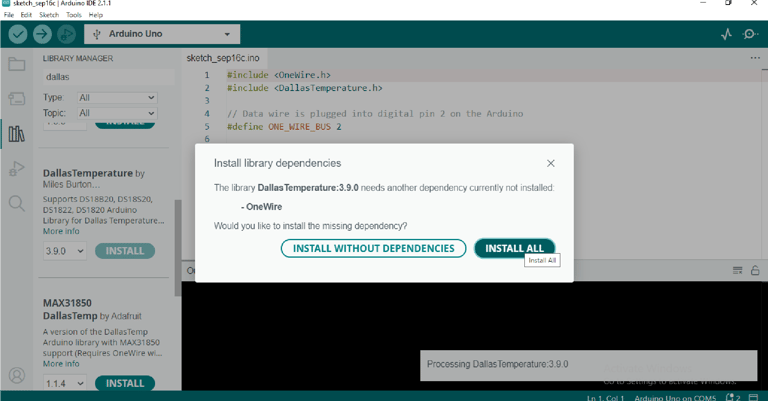
Now search for DallasTemperature.h and install the library as shown in the below figure.
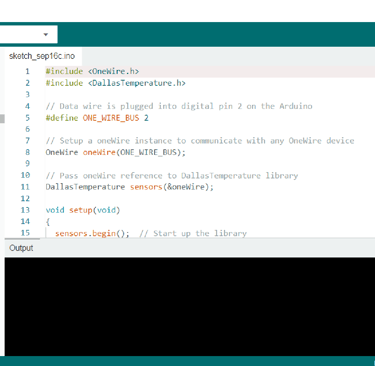
code
#include <OneWire.h>// library declaration #include <DallasTemperature.h> // library for sensor
float tempC, tempF;
#define ONE_WIRE_BUS 2// Data wire is plugged into digital pin 2 on the Arduino
OneWire oneWire(ONE_WIRE_BUS); // Setup a oneWire instance to communicate with any OneWire device
DallasTemperature sensors(&oneWire);// Pass oneWire reference to DallasTemperature library
void setup(void) {
sensors.begin(); // Start up the library Serial.begin(9600); }
void loop(void) {
sensors.requestTemperatures(); // Send the command to get temperatures
tempC = sensors.getTempCByIndex(0); // the reading from sensor is stored in the assigned variable tempC
tempF = sensors.getTempFByIndex(0);// the reading is from sensor stored in the assigned variable tempF Serial.print("Temperature: "); Serial.print(tempC);//print the temperature in Celsius
Serial.print("°C | "); Serial.print(tempF);//print the temperature in Fahrenheit Serial.println("°F");
delay(500); }
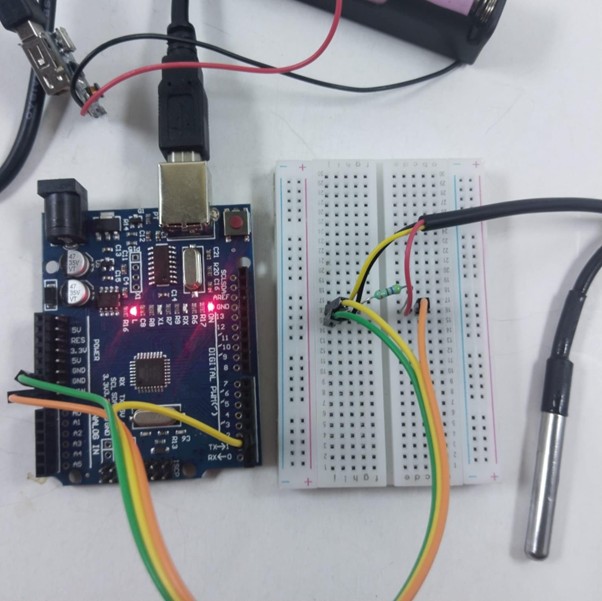
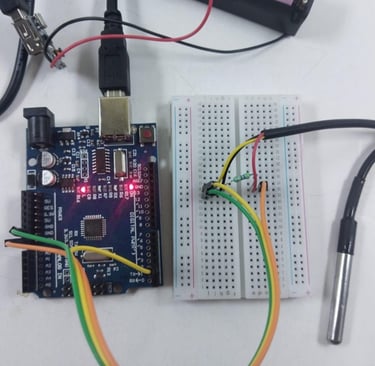
Fig: DS18B20 is turned ON after connecting according to the schematic diagram