Interfacing LM393 Infrared Speed Sensor with Arduino
To measure the speed of a motor using Arduino, an LM393 Speed Sensor can be used. This module is essentially an Infrared Light Sensor integrated with an LM393 Voltage Comparator IC. Speed sensors are commonly utilized to measure rotational speed in various devices. They are essential in a wide range of applications, including automotive vehicles, aerospace systems, off-highway and construction machinery, railway systems, and military vehicles.
TRAINING
2/1/20252 min read
Introduction
To measure the speed of a motor using Arduino, an LM393 Speed Sensor can be used. This module is essentially an Infrared Light Sensor integrated with an LM393 Voltage Comparator IC. Speed sensors are commonly utilized to measure rotational speed in various devices. They are essential in a wide range of applications, including automotive vehicles, aerospace systems, off-highway and construction machinery, railway systems, and military vehicles.
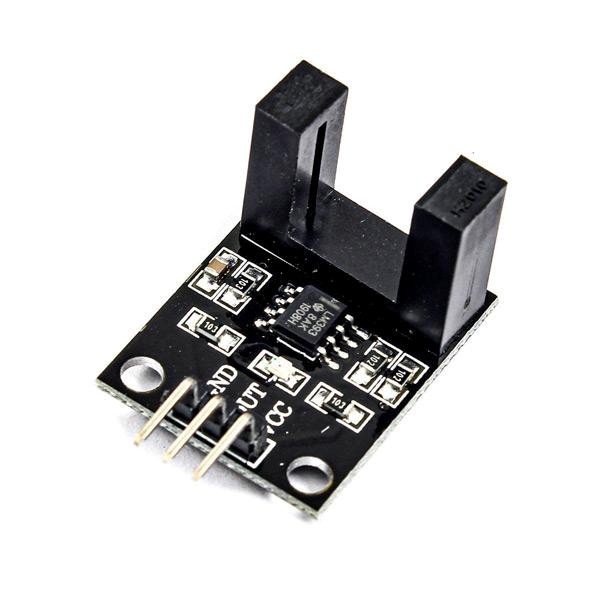
LM393 Speed Sensor Features
The LM393 module functions as an IR counter, consisting of an IR transmitter and receiver. When an object or obstacle interrupts the infrared beam between these sensors, the module sends a signal to the microcontroller. This sensor is widely used for applications such as motor speed detection, pulse counting, and position limit detection in automation and control systems.

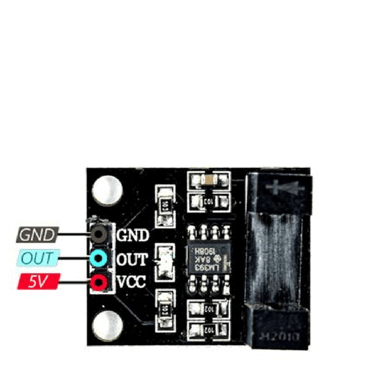
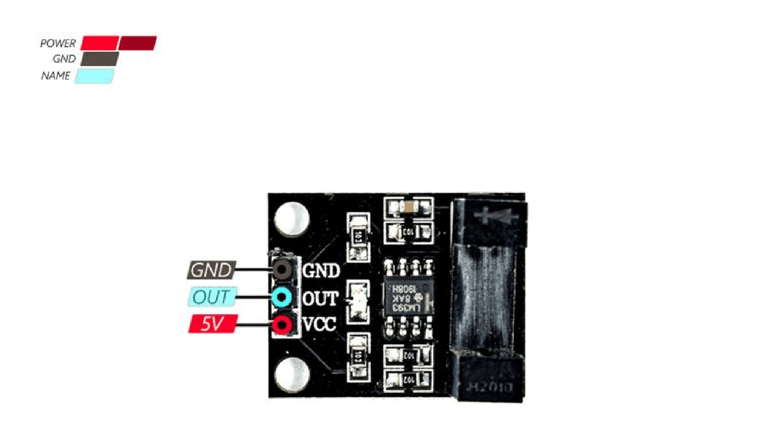
LM393 Sensor Pinout
The LM393 sensor has three pins:
VCC: Power supply for the module (3-5.5V)
GND: Ground connection
OUT: Digital output that sends data to the microcontroller
The pinout of this module is illustrated in the image below.

Hardware Components
Arduino UNO R3
LM393 Infrared Speed Sensor Module
Male-Female Jumper Wires
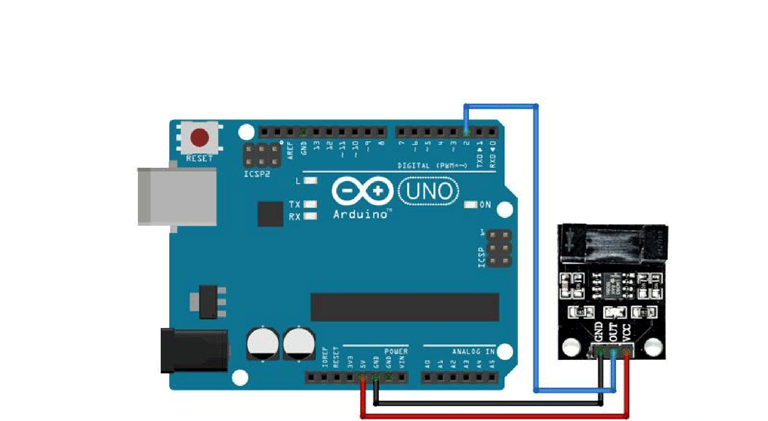
Circuit Diagram
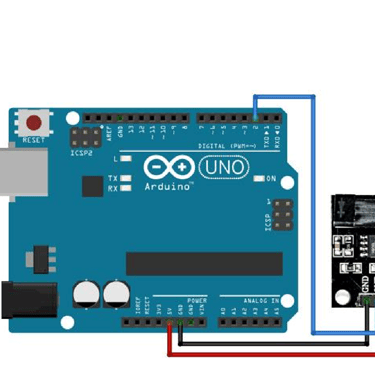
The following diagram illustrates how to connect the Arduino to the LM393 sensor. Ensure that the connections are made as shown.

Hardware Components
Arduino UNO R3
LM393 Infrared Speed Sensor Module
Male Female Jumper Wire
Circuit diagram
The following circuit shows how you should connect Arduino to LM393 sensor.
Connect wires accordingly.
Code
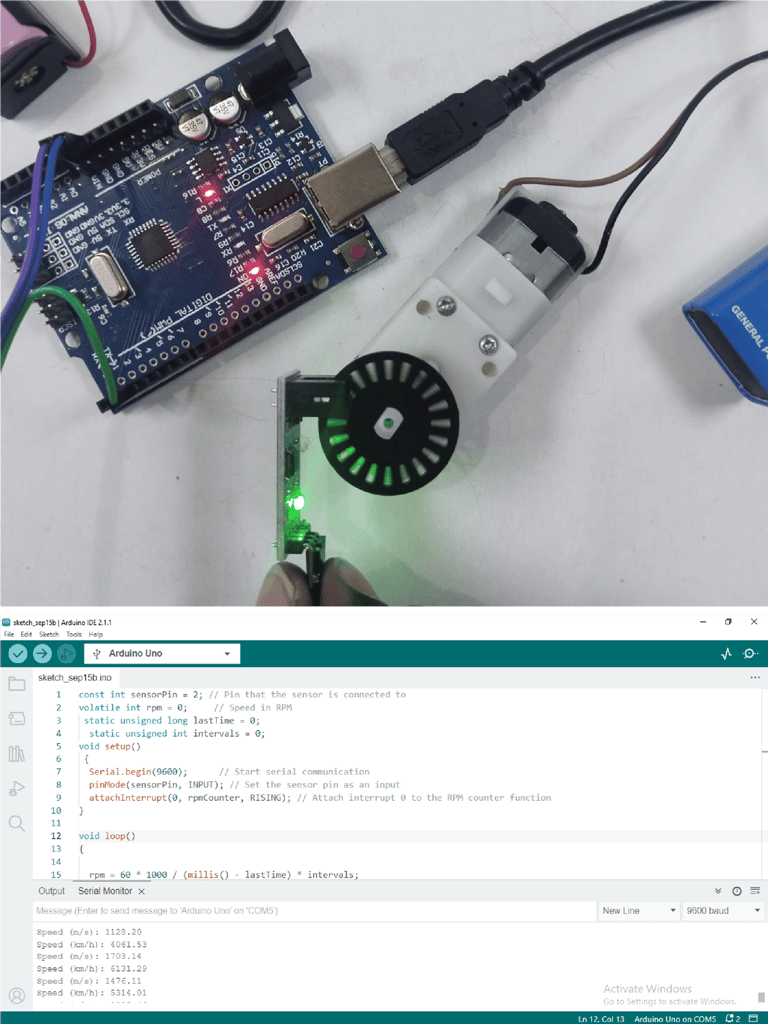
const int sensorPin = 2; // Pin that the sensor is connected to volatile int rpm = 0; // Speed in RPM static unsigned long lastTime = 0; static unsigned int intervals = 0; void setup() { Serial.begin(9600); // Start serial communication pinMode(sensorPin, INPUT); // Set the sensor pin as an input attachInterrupt(0, rpmCounter, RISING); // Attach interrupt 0 to the RPM counter function
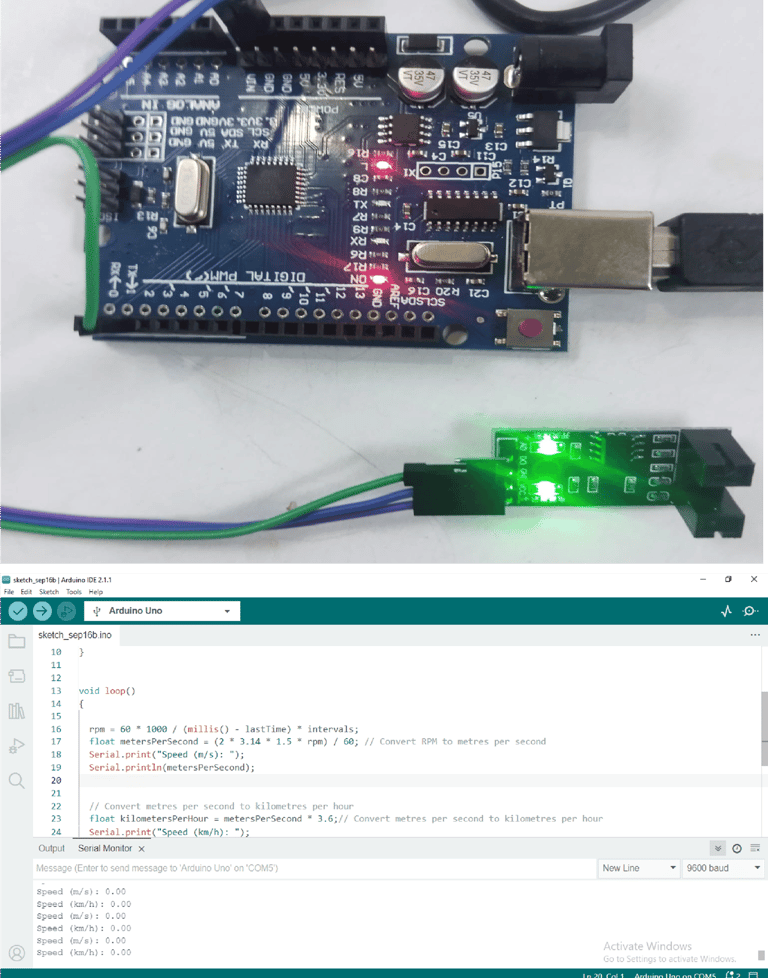
} void loop() { rpm = 60 1000 / (millis() - lastTime) intervals; float metersPerSecond = (2 3.14 1.5 * rpm) / 60; // Convert RPM to metres per second Serial.print("Speed (m/s): ");
Serial.println(metersPerSecond);
// Convert metres per second to kilometres per hour
float kilometersPerHour = metersPerSecond * 3.6;// Convert metres per second to kilometres per hour Serial.print("Speed (km/h): ");
Serial.println(kilometersPerHour); delay(1000); } void rpmCounter() { intervals++; lastTime = millis(); }
Working