
Interfacing Ultrasonic Sensor (HC-SR04) with Arduino UNO
Ultrasonic sensors are highly effective for measuring distances and detecting objects without requiring physical contact. They are widely used in applications such as liquid level measurement, proximity detection, and automotive systems like self-parking and anti-collision mechanisms. Previously, we have built several ultrasonic sensor-based projects, including water level detection and ultrasonic radar systems. This method offers a precise way to measure short distances efficiently.
TRAINING
2/3/20254 min read
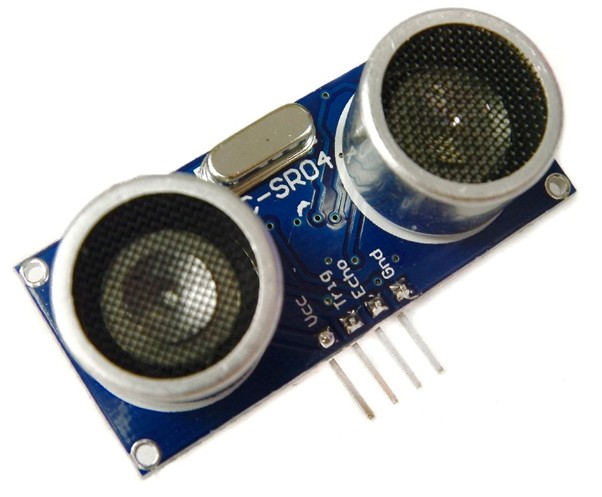
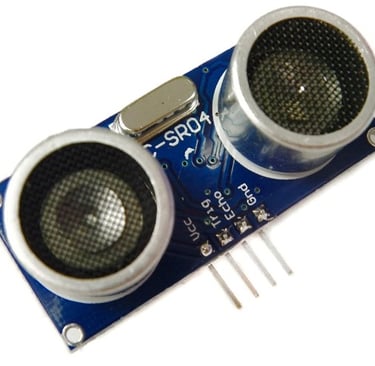
Fig1: HC-SR04 Ultrasonic Sensor
Ultrasonic Sensor for Distance Measurement
Ultrasonic sensors are highly effective for measuring distances and detecting objects without requiring physical contact. They are widely used in applications such as liquid level measurement, proximity detection, and automotive systems like self-parking and anti-collision mechanisms. Previously, we have built several ultrasonic sensor-based projects, including water level detection and ultrasonic radar systems. This method offers a precise way to measure short distances efficiently.
In this project, we will use the HC-SR04 Ultrasonic Sensor with an Arduino to measure the distance of an obstacle. The fundamental principle of ultrasonic distance measurement is based on the ECHO phenomenon. When sound waves are emitted, they reflect off an obstacle and return to the sensor as an echo. By calculating the time taken for the waves to travel to the obstacle and back, we can determine the distance. Since the speed of sound in air is known, the required distance can be computed using simple calculations.
Ultrasonic Sensor Module (HC-SR04)
Several Arduino-compatible ultrasonic sensors are available, but for this project, we are using the HC-SR04, which can measure distances ranging from 2 cm to 400 cm, with an accuracy of ±3 mm. The module consists of an ultrasonic transmitter, receiver, and control circuit.
Working Principle of the Ultrasonic Sensor:
A high-level signal is sent for 10µs using the Trigger pin.
The module automatically emits eight 40 kHz ultrasonic pulses and then checks for a returning pulse.
If a signal is received, the Echo pin goes high, and the duration of this high pulse corresponds to the round-trip travel time of the sound waves.
The distance is calculated using the formula:
Distance = (Time × Speed of Sound in Air (340 m/s)) / 2.
Using this principle, we can accurately measure the distance of an object from the sensor in our Arduino-based distance measurement project.
fig2:HC-SR04 ultrasonic sensor
Timing Diagram Explanation
The HC-SR04 Ultrasonic Sensor operates based on the ECHO principle. To measure distance, a trigger pulse of approximately 10µs is sent to the sensor. This prompts the module to emit 8 cycles of 40 kHz ultrasonic waves. These waves travel through the air, hit an obstacle, and reflect back to the sensor.
The receiver detects the returning echo, and the time taken for the signal to travel to the obstacle and back is recorded. The distance of the object is then calculated using the formula:
Distance = (Time × Speed of Sound) / 2
Since the recorded time represents the round-trip duration (to the obstacle and back), we divide by 2 to determine the one-way travel time of the sound waves. This method ensures an accurate distance measurement.
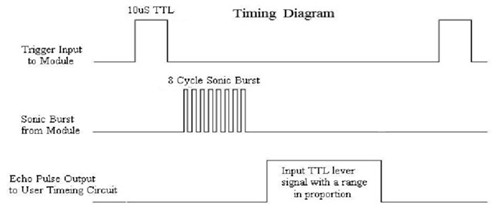
Fig3: Timing diagram
Ultrasonic Sensor Arduino Circuit Diagram and Explanation
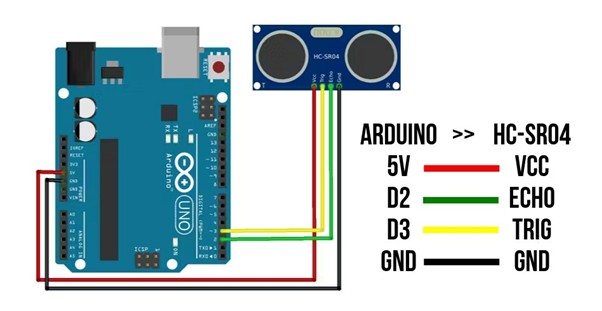
Fig 4:schematic diagram of ultrasonic sensor with arduino
Arduino and Ultrasonic Sensor Circuit Overview
The circuit diagram above illustrates how to connect an HC-SR04 Ultrasonic Sensor to an Arduino for distance measurement. The "Trigger" and "Echo" pins of the ultrasonic module are directly connected to pin 18 (A4) and pin 19 (A5) of the Arduino.
To measure distance, the Arduino first triggers the sensor to emit an ultrasonic pulse. It then waits for the ECHO signal to return. The Arduino records the time taken for the signal to travel to the obstacle and back.
Using the speed of sound (approximately 340 m/s), the distance can be calculated with the formula:
Distance = (Travel Time / 2) × Speed of Sound
Ultrasonic Sensor Code for Arduino
The complete code for this project reads the travel time using the pulseIn(pin) function. It then performs the necessary calculations and displays the results on the Serial Monitor.
Code:
const int trigpin=3;// Arduino pin connected to Ultrasonic Sensor's TRIG pin
const int echopin=2;// Arduino pin connected to Ultrasonic Sensor's ECHO pin int duration; //time taken for ultrasonic waves to travel float distance; // distance from ultrasonic sensor to obstacle void setup() {
pinMode(trigpin,OUTPUT); // set arduino pin to output mode
pinMode(echopin,INPUT); // set arduino pin to input mode Serial.begin(9600); // initialise serial port
}
void loop() { // generate 10-microsecond pulse to TRIG pin digitalWrite(trigpin,LOW); delayMicroseconds(2); digitalWrite(trigpin,HIGH); delayMicroseconds(10); digitalWrite(trigpin,LOW);
duration=pulseIn(echopin,HIGH);// measure duration of pulse from ECHO pin
distance=duration*0.034/2;// formula to calculate the
distance
Serial.println(distance); // prints the distance in the serial monitor delay(1000); }
Output:
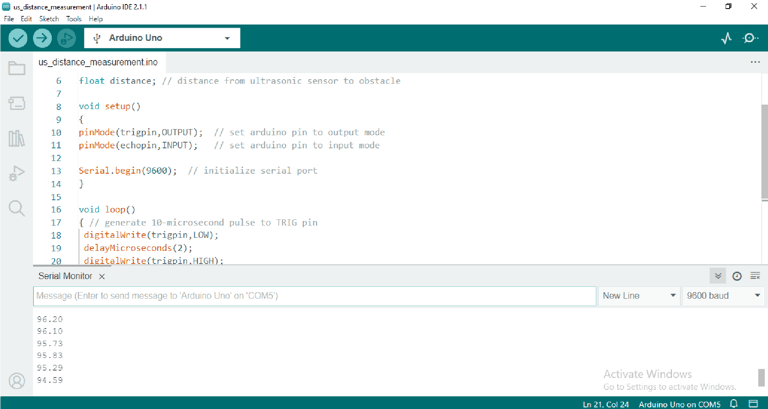
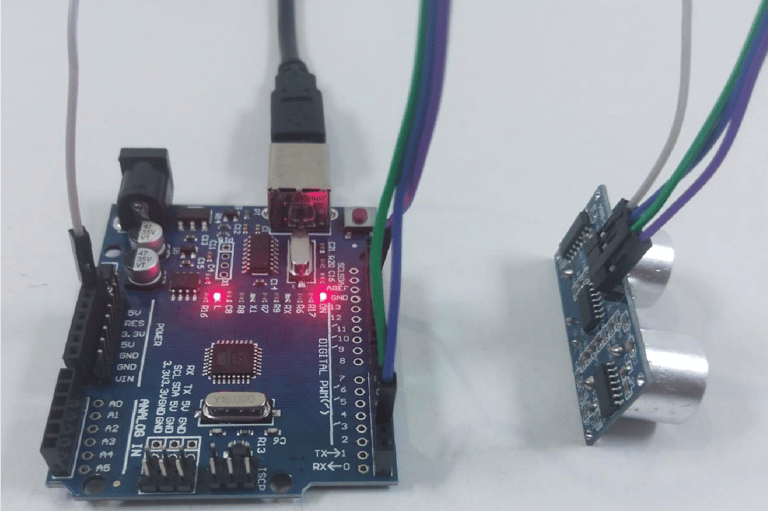
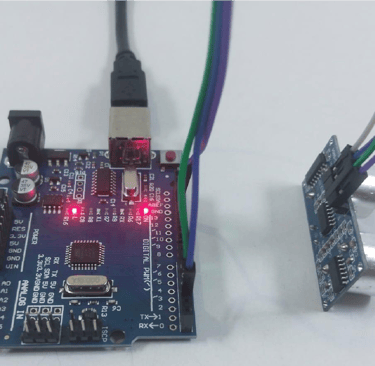
Fig5: when there is no obstacle
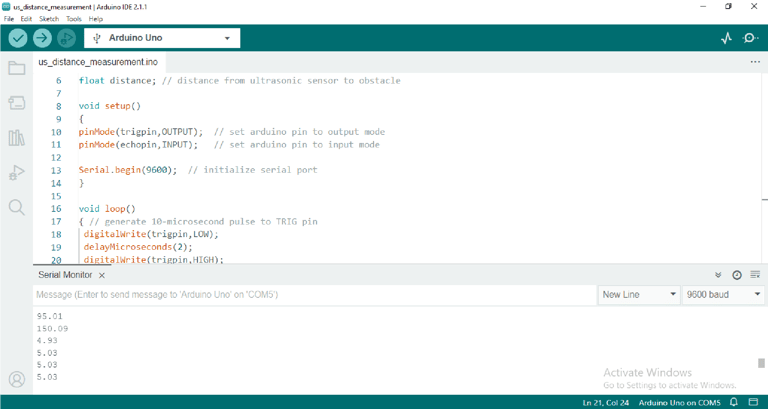
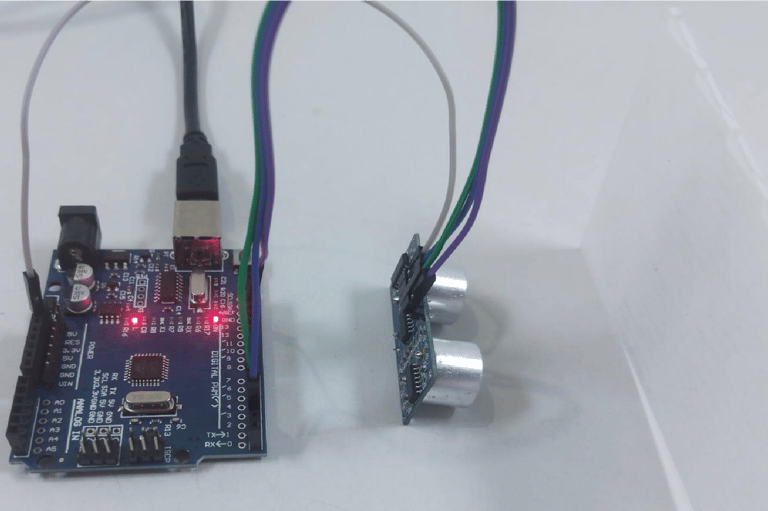
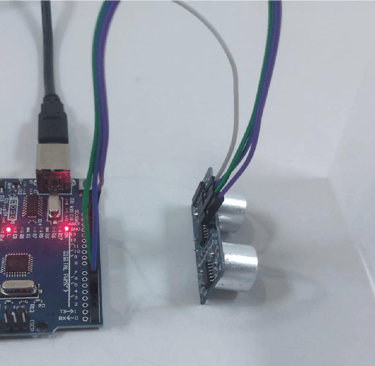
Fig 6 : when there is an obstacle
Advantages:
Unaffected by the color or transparency of objects.
Functions efficiently in dark environments.
Cost-effective solution.
Performs well in dusty, dirty, or high-moisture conditions.
Limitations:
Ineffective in a vacuum.
Not suitable for underwater applications.
Accuracy can be impacted by soft materials.
Temperature fluctuations of 5–10 degrees or more can affect performance.
Limited detection range.
Applications:
Liquid level monitoring.
Object presence detection.
Robotic sensing.
People counting.
General presence detection.Write your text here...