MQ-3 Alcohol Sensor with arduino
Sensors are crucial for ensuring the safety and security of various spaces, including apartments, homes, and businesses, by detecting smoke, fire, or gas and alerting the relevant individuals. In today's post, we will focus on one such sensor: the MQ-3. The MQ-3 is an alcohol-sensitive sensor commonly used in breathalyzers. Let's dive into the details!
TRAINING
1/31/20256 min read
Introduction:
Sensors are crucial for ensuring the safety and security of various spaces, including apartments, homes, and businesses, by detecting smoke, fire, or gas and alerting the relevant individuals. In today's post, we will focus on one such sensor: the MQ-3. The MQ-3 is an alcohol-sensitive sensor commonly used in breathalyzers. Let's dive into the details!
MQ-3 Alcohol Sensor Pinout
The MQ-3 Gas Detection Sensor Module has four pins that can be used to gather data from the sensor: VCC, GND, Aout, and Dout. The pinout for the MQ-3 Alcohol Detection Sensor is as follows:
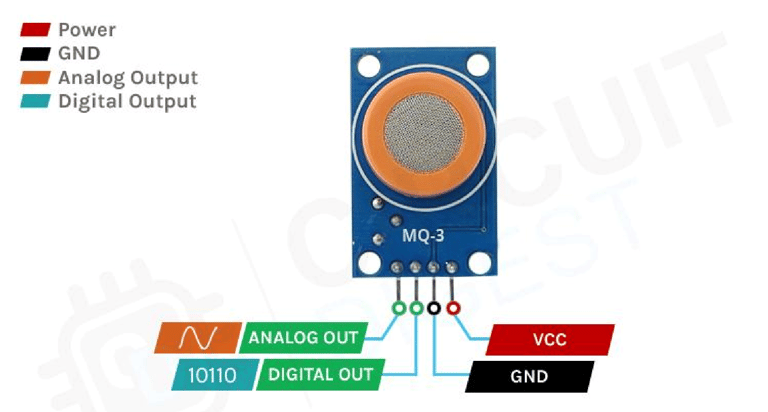
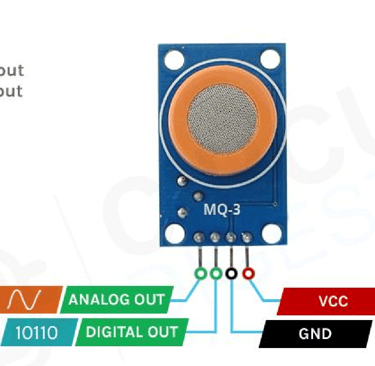
VCC is the power supply pin for the Gas Detection Sensor, which should be connected to a 5V source.
GND is the ground pin of the board, and it must be connected to the Arduino's ground pin.
DOUT is the digital output pin of the board; a low output means no alcohol is detected, while a high output indicates the presence of alcohol.
AOUT is the analog output pin of the board, which provides an analog signal that fluctuates between VCC and ground based on the detected alcohol level.
MQ-3 Alcohol Sensor Module – Components
The MQ-3 Sensor is widely used by beginners due to its common application in Arduino projects for alcohol detection. It is an affordable, easy-to-use sensor with a broad detection range, which can be adjusted to change its sensitivity. The component labels for the MQ-3 Sensor are shown below.
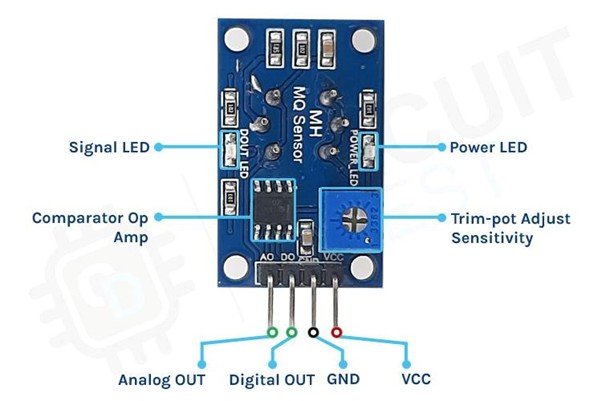
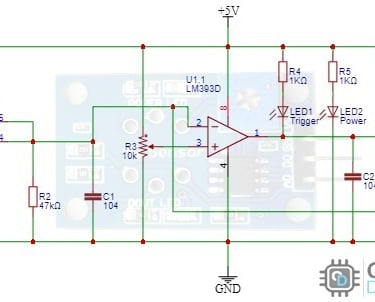
The MQ-3 Alcohol Sensor Module has four pins, two of which are for VCC and GND. The other two pins can output both analog and digital data, similar to other basic sensor modules. We power the circuit using the Arduino's 5V pin, as the module operates within a 5V working voltage range with a 0.1% tolerance. The module also has two built-in LEDs, as shown in the diagram above. When the board is powered on, the power LED lights up, and the Dout LED lights up when the potentiometer's trigger value is reached. Additionally, the board features an OP-Amp comparator that converts the analog signal from the gas sensor into a digital signal.
How Does the MQ-3 Alcohol Sensor Module Work?
To accurately detect alcohol, the MQ-3 gas sensor requires a heating element. However, placing a heating element directly near alcohol could be hazardous. To mitigate this risk, the sensor is designed with an anti-explosion network made of two thin layers of stainless steel mesh, as shown in the figure below. This stainless steel mesh contains the heating element.

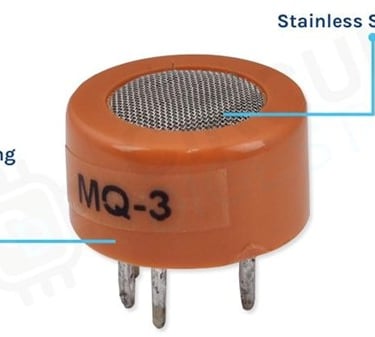
This mesh structure also provides protection against dust and other suspended particles, ensuring that only gaseous components from the environment can pass through. Upon disassembling the sensor, we can observe that it consists of two main components. The first is the heating element, made of nichrome wire, and the second is the detecting element, which is made of platinum wire coated with tin dioxide. The image below shows the mesh removed from the actual sensor.
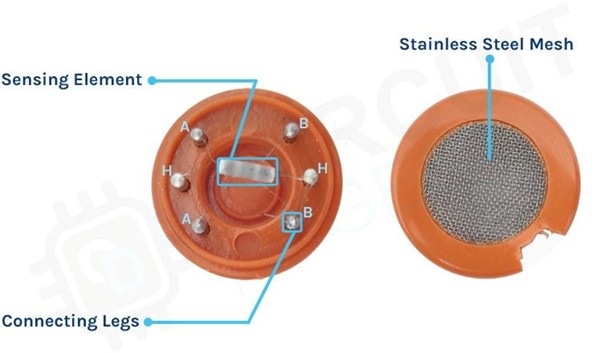
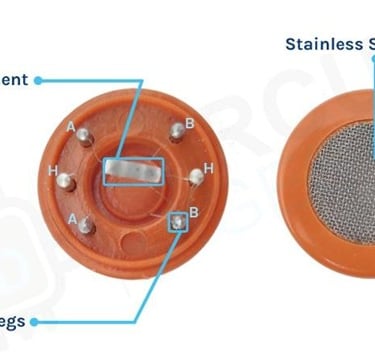
When the mesh is removed from the sensor, it appears as shown. The stainless steel mesh is cut and placed on the side of the sensor, as seen in the image above. The sensing component we discussed earlier is now visible. The star-shaped pins of the sensor are created by attaching the detecting and heating elements to the sensor's six legs. The black base of the sensor, made of Bakelite to enhance heat conductivity, is also visible.
Preheat Time for MQ-3 Sensor
Working with this type of alcohol sensor requires a preheat or stabilization period for proper functioning. According to the device's datasheet, it needs a 48-hour preheat period. Does this mean it must be turned on for 48 hours before use?
The clear answer to this question is NO. The sensor does not need to be continuously powered for 48 hours before use. The 48-hour period ensures that the sensor reaches standard performance as stated in the datasheet, based on testing conducted in a lab after 48 hours. To stay within the recommended parameters, the 48-hour preheat time should be followed. However, thermal equilibrium is likely achieved within 30 minutes, given the sensor's small size, and you'll likely reach numbers close to the datasheet values within a few minutes.
The 48-hour warm-up period is essential only if you require precise alcohol concentration measurements. For accurate measurements, you would also need to calibrate the sensor and account for environmental factors like temperature and humidity.
The MQ-3 Sensor is capable of detecting and measuring alcohol levels in PPM. It's important to note that detecting vapor and measuring its concentration in PPM are two distinct tasks. This article primarily focuses on detecting alcohol levels and concentration increases. However, if you aim to measure alcohol concentration in PPM accurately, the method is slightly different, though we'll touch on it briefly.
How to Measure Alcohol Concentration in PPM Using the MQ-3 Sensor?
The MQ-3 Sensor is highly accurate and calibrated to detect the PPM of alcohol in the environment. To do this, you first need to understand the sensitivity characteristics of the MQ-3 Sensor, which can be found in the datasheet, as shown in the image below.
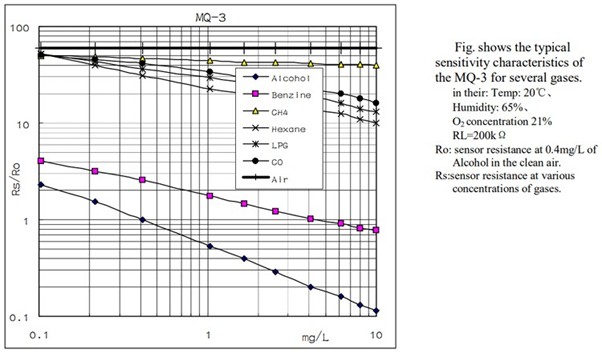
In the logarithmic graph, RS is the sensing resistance during the presence of Alcohol. While R0 is the sense resistance to clean air. This Sensor is designed to detect Alcohol and has minor sensitivity to Benzine, so this Sensor's resistance will change depending on the concentration of alcohol present in the atmosphere.
Internal Schematic of MQ-3 Sensor Module
The MQ-3 Alcohol Detection Sensor Module circuit diagram is given below. This module's design is relatively basic and only requires a few components to construct. The schematic presented below will come in helpful if you are in a rush to create this circuit.
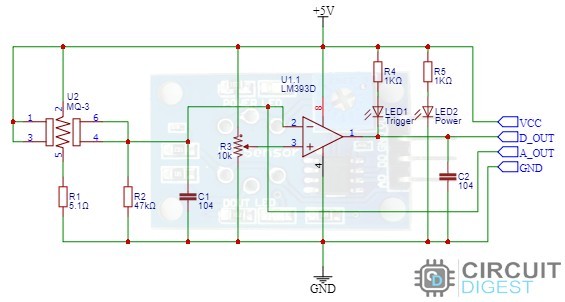
The schematic includes an LM393 op-amp, a low-power, low-offset voltage op-amp that can be powered by a +5V supply. However, since the MQ-3 Sensor requires a minimum operational voltage of 5V, it's not possible to power the circuit with 3.3V. The primary function of this op-amp is to convert the incoming analog signal into a digital signal. Additionally, there is an integrated 10K potentiometer to adjust the sensitivity of the MQ-3 Alcohol Sensor module's triggering voltage. The board also contains two LEDs: the power LED, which lights up when the board is powered, and the trigger LED, which lights up when a specific threshold is reached. Finally, the board has two decoupling capacitors to help reduce noise.
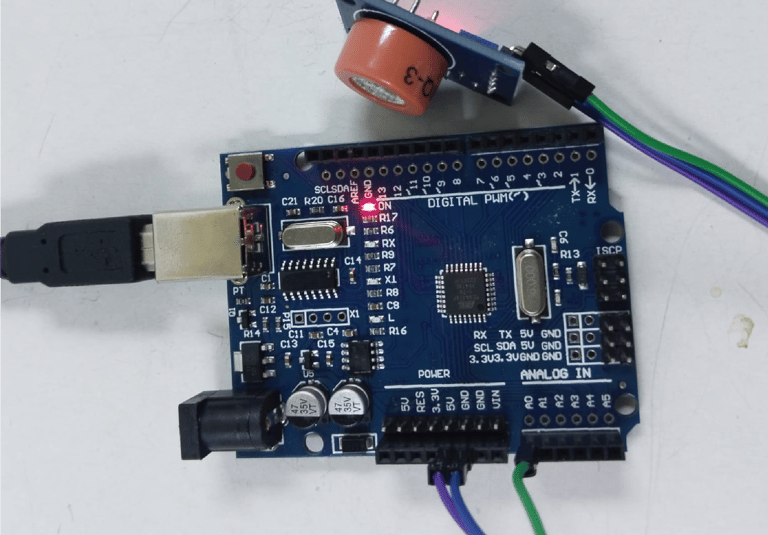
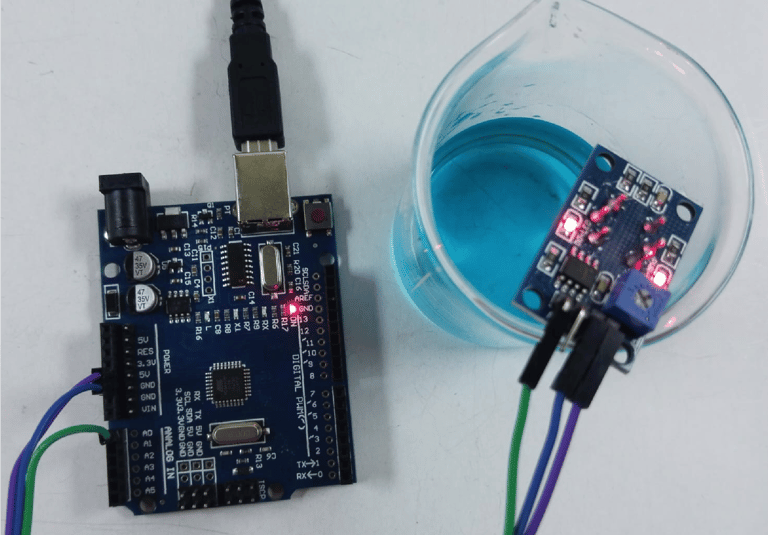
Arduino Uno MQ-3 Alcohol Sensor – Wiring Diagram
Now that we understand how the MQ-3 alcohol sensor works, we can connect the necessary wires to the Arduino Uno and see how it functions. We will begin with the analog setup, followed by the digital setup, which is straightforward.
To power the sensor, we will use the 5V and GND pins from the Arduino UNO Board, and the sensor's output pin will be connected to the A0 pin on the Arduino.
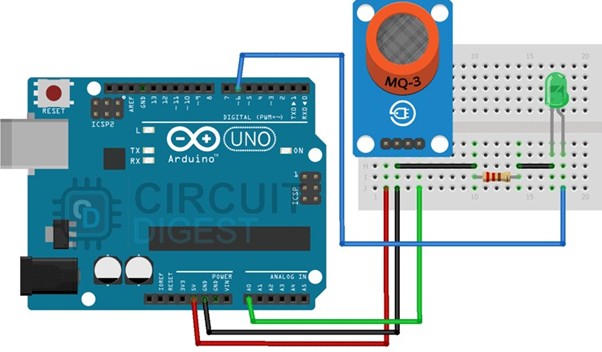
We have connected the analog pin to the A0 pin on the Arduino, and the ground pin is connected to the sensor as shown in the diagram above.
To read the sensor's digital output, simply connect the sensor’s output to any digital pin on the Arduino. Check the pin for a high pulse: if the Arduino detects a high pulse, it means alcohol has been detected; if the Arduino detects a low pulse, there is no alcohol present in the environment.
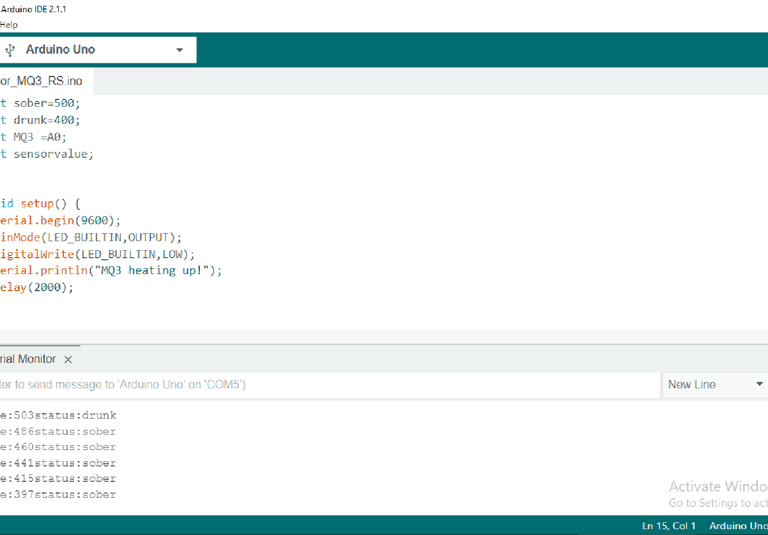
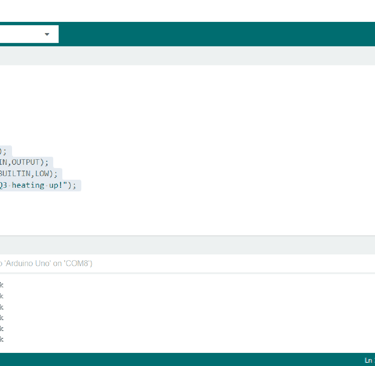
Arduino Code for Interfacing MQ-3 Gas Sensor Module
The code for the Arduino MQ-3 alcohol sensor module is straightforward. We are simply reading the analog data from the sensor and adjusting the LED’s brightness based on the received data. Please note that we are processing only the analog data from the sensor; for digital data, the module's built-in LED will light up.
int drunk int sober=500;
=400;
int MQ3 =A0;
int sensorvalue; void setup() { Serial.begin(9600);
pinMode(LED_BUILTIN,OUTPUT);
digitalWrite(LED_BUILTIN,LOW); Serial.println("MQ3 heating up!");
delay(2000);
}
void loop() {
sensorvalue=analogRead(MQ3); Serial.print("sensorvalue:"); Serial.print(sensorvalue);
if (sensorvalue<sober) { Serial.println("status:sober");
delay(1000); }
else if (sensorvalue>=sober && sensorvalue<drunk) {
Serial.println("status:drinking but within legal limits"); delay(1000); }
else { Serial.println("status:drunk");
delay(1000); }
}
Working